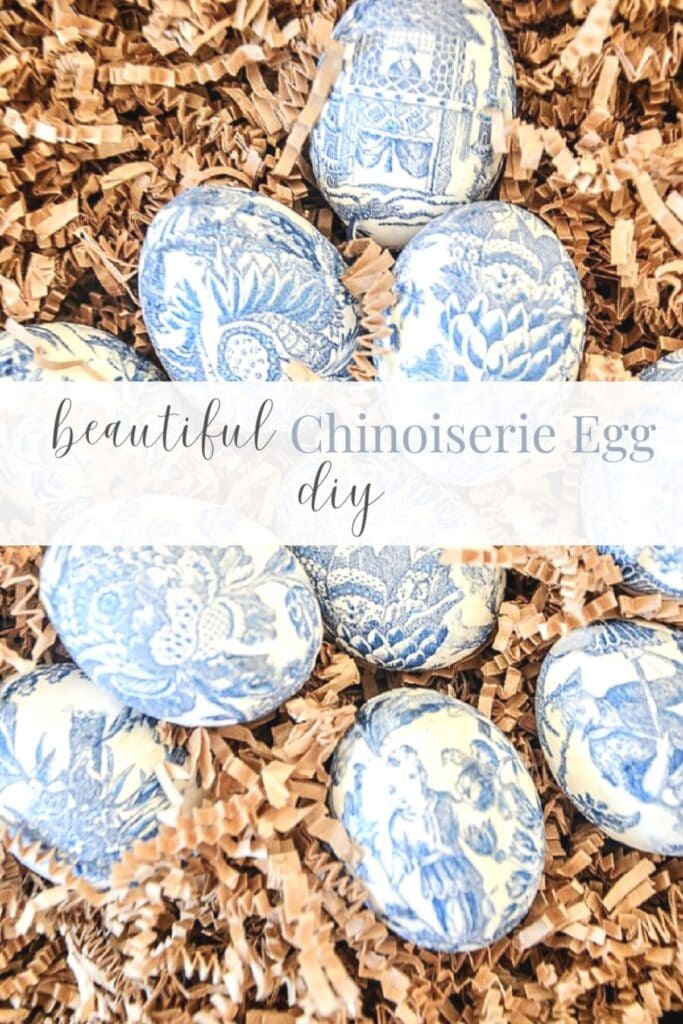
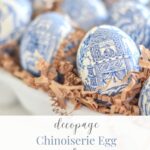
How To Make Beautiful Chinoiserie Decoupage Eggs
Make these beautiful blue and white chinoiserie eggs with paper napkins, ModPodge, and a couple of other things. They are so easy to make and so attractive. Make them work with your spring or Easter decor.
This post may contain affiliate links. See my disclosure statement for details.
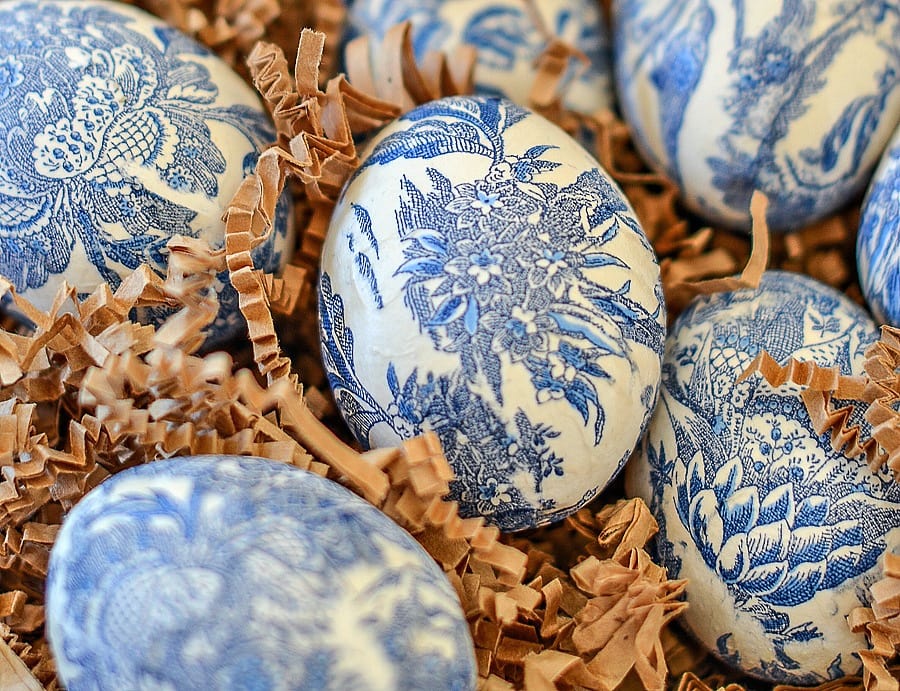
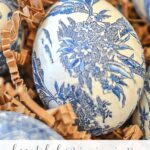
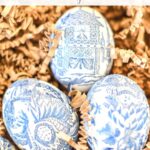
Chinoiserie Easter eggs are absolutely stunning and surprisingly easy to make! These chic, upscale eggs add a beautiful wow factor to your spring or Easter decor. Whether you’re styling a seasonal vignette, setting a gorgeous table, or just looking for a unique decorative touch, these eggs are a must-try.
Even if you don’t consider yourself crafty, you can make these! This simple decoupage DIY is all about layering delicate napkin designs onto eggs with Mod Podge. The hardest part? Waiting for them to dry! I made a whole batch, and most of my time was spent letting them set between coats while I went about my day.
If you can glue a napkin to an egg, you can make these chinoiserie eggs! This project is perfect for beginners and even a great craft for older kids who love hands-on activities.
What Is Chinoiserie
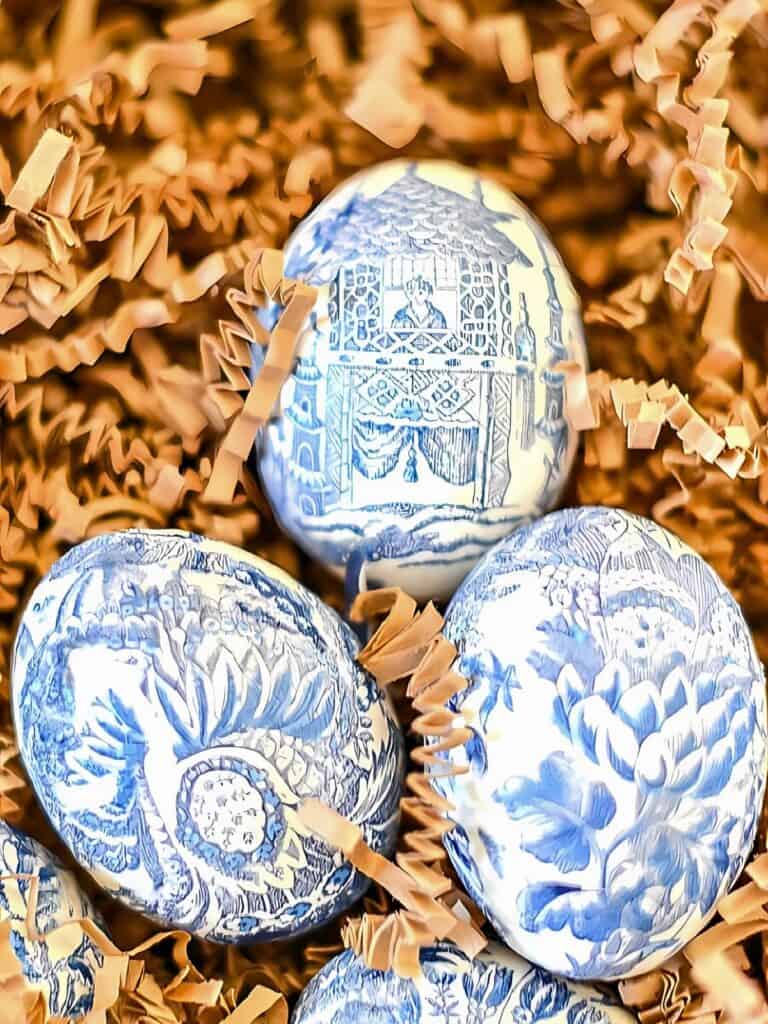
Chinoiserie is a timeless design style inspired by the art, architecture, and decorative elements of 17th- and 18th-century China, as interpreted through a European lens. It’s known for its intricate patterns, delicate florals, pagodas, birds, and landscapes, often in classic blue and white. This elegant and decorative style has been used in everything from fine china and wallpaper to furniture and textiles, bringing a refined look to interiors for centuries. When applied to Easter eggs, chinoiserie transforms simple decor into something truly special!
A Look At Decoupage
Decoupage is a beautiful craft that involves decorating objects by layering cut-out paper or fabric onto a surface and sealing it with a special adhesive, usually Mod Podge or another clear-drying glue. The word “decoupage” comes from the French word découper, meaning “to cut out,” which perfectly describes this technique. By carefully applying images, patterns, or decorative motifs to an object, decoupage creates the illusion of a hand-painted design with intricate detail and depth.
This artistic craft has been used for centuries to embellish furniture, trays, decorative boxes, and home accessories like vases and picture frames.
It’s a versatile technique that can range from rustic and charming to refined and elegant, depending on the materials and patterns used. The best part? Decoupage allows you to transform everyday objects into one-of-a-kind pieces with just a little creativity and patience.
Materials Needed
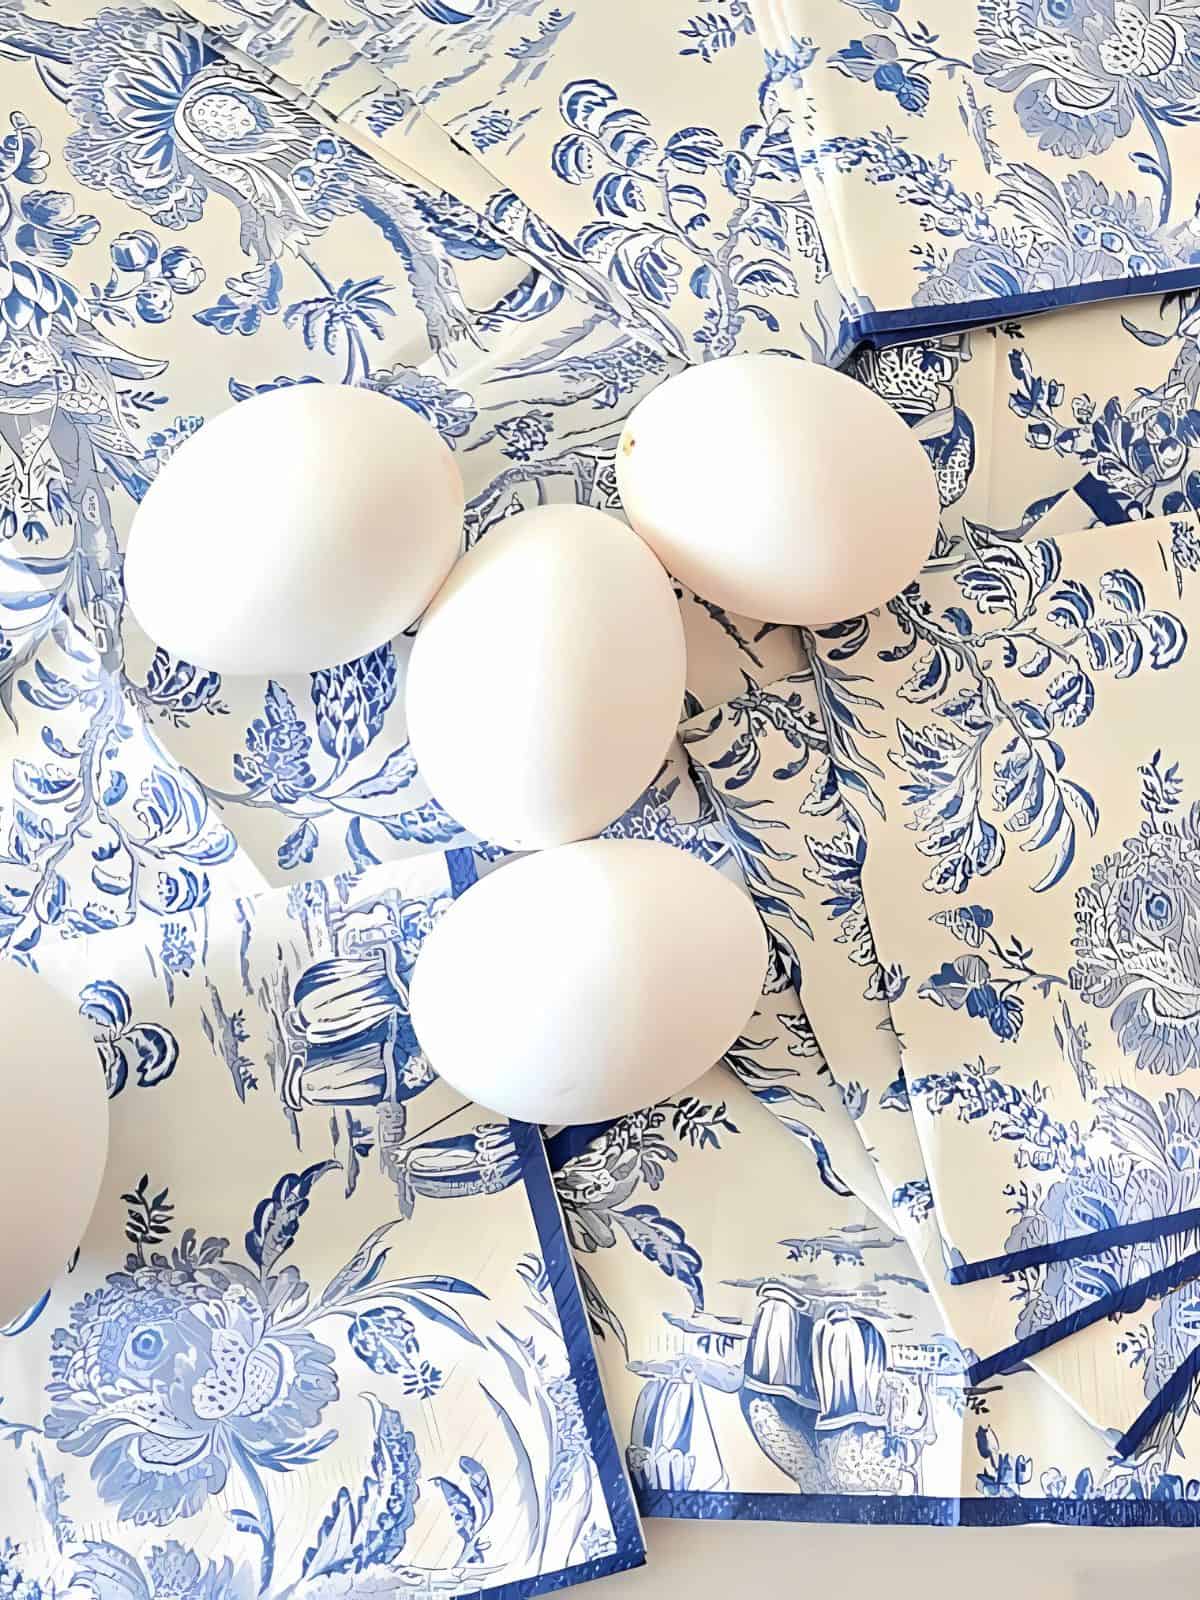
Just a few items are needed to make these beautiful Chinoiserie eggs…
- Blown-out eggs or white plastic eggs like the ones HERE.
- Chinoiserie cocktail napkins or other decorative napkins (see them HERE)
- Matte MOD PODGE (see it HERE)
- Foam brush (see them HERE)
Instructions To Make Chinoiserie Eggs
Making a chinoiserie Easter egg is easier than it looks and so much fun! You can create elegant, high-end-looking decor that will be a favorite part of your spring and Easter home. This project is all about layering delicate chinoiserie patterns onto eggs for a timeless and sophisticated look.
How To Hollow Out An Egg
- Using the tip of a sharp paring knife or a skewer, carefully make a small hole (smaller than the size of a pencil eraser) in both the top and bottom of a fresh egg.
- Insert a toothpick into the holes and gently move it around to break the membrane inside. This will help the egg contents flow out more easily.
- Place your lips over the pointy end of the egg and blow steadily into the hole, directing the contents into a bowl. A medium, steady stream of air works best. Blowing too hard may crack the egg. Save the egg contents for cooking or baking later.
- Rinse the empty shell by running a slow stream of water into the larger hole. Shake gently and remove any remaining egg.
- Pat the ends of the egg dry with a paper towel, then set it aside to air dry completely inside and out.
Preparing The Napkins
To achieve a delicate and smooth look, it’s important to separate the layers of your decorative napkin before applying it to the egg. Most napkins are multi-ply, meaning they have several layers, but only the top printed layer is needed for this project. Here’s how to prepare your napkins properly:
- Carefully unfold the napkin and locate the edges where the layers separate.
- Gently peel away the bottom plain layers, leaving only the top layer with the chinoiserie design. If the napkin plies do not separate, you might want to tear along the edge of the napkin to expose the layers. Keep the top printed layer.
- Discard the extra plies as they are not needed for this project.
Now, your napkin is ready to be used for decoupage, and you’re one step closer to creating beautiful chinoiserie eggs!
Decoupaging The Napkin On To The Egg
Now comes the fun part—transforming plain eggs into beautiful chinoiserie-inspired decor! Decoupage is all about layering delicate napkin pieces onto the eggs with Mod Podge, creating an elegant, seamless look. Take your time, work in small sections, and enjoy the process!
- Tear the prepared napkin into small pieces, focusing on individual motifs or patterns. Tearing instead of cutting helps the edges blend more naturally.
- Using a foam brush, apply a thin layer of Mod Podge to a small section of the egg.
- Carefully place a napkin piece over the glued area, smoothing it gently with your fingers or the brush to remove wrinkles and bubbles. Be delicate, as the napkin is thin and can tear easily.
- Once the piece is in place, brush another thin layer of Mod Podge over it to seal it onto the egg.
- Repeat the process, working in small sections, until the entire egg is covered. Overlapping pieces slightly will create a seamless look.
- Allow the egg to dry completely before handling it. If needed, apply a second coat of Mod Podge for extra durability and a smooth finish.
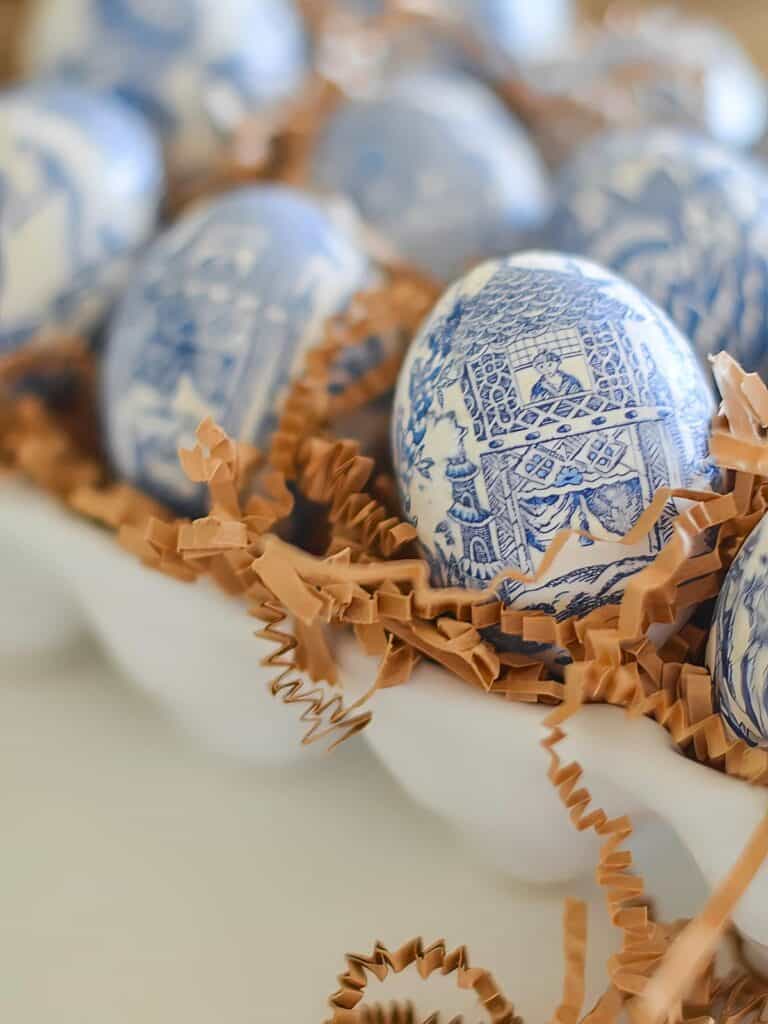
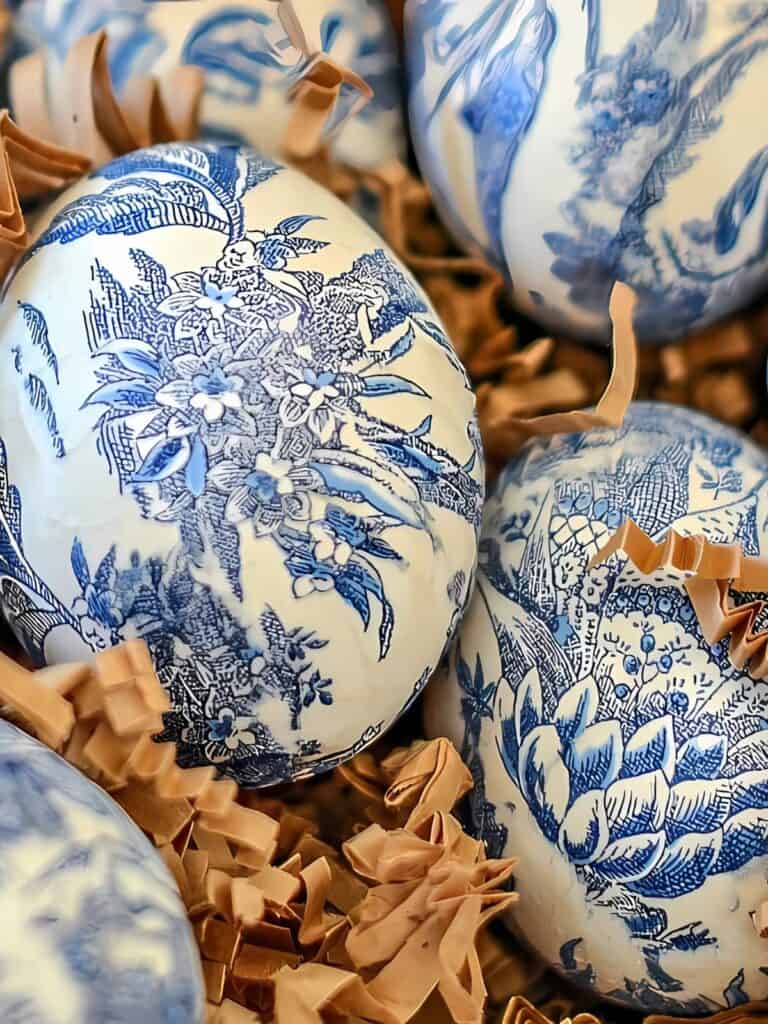
- Once dry, your beautiful chinoiserie eggs are ready to display!
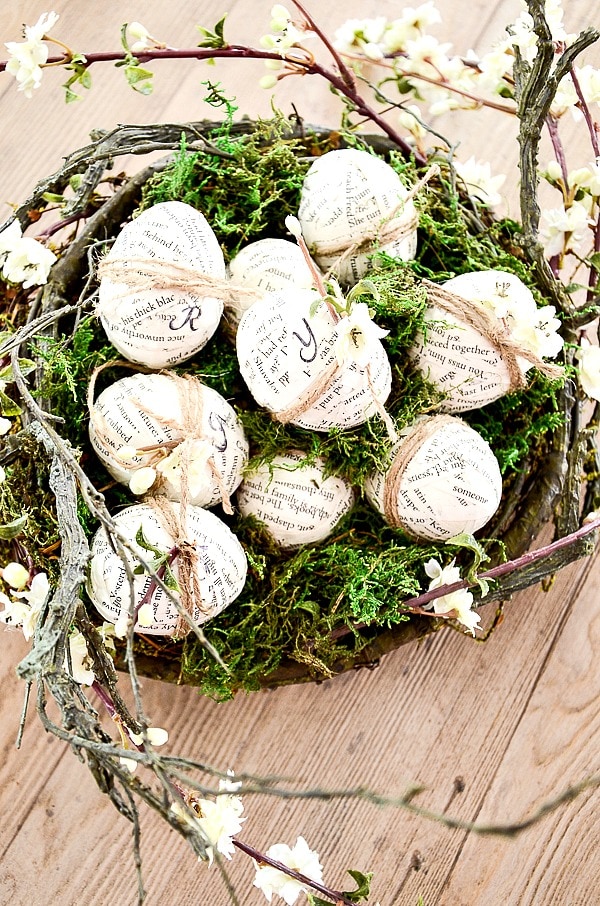
Beautiful Torn Tissue Decoupage Eggs will show you step-by-step directions with lots of images for decoupaging eggs.
Here is a post for Chinoiserie Pumpkins that are stunning to add to your fall decor!
Ways To Use Chinoiserie Eggs
Once your beautiful chinoiserie eggs are complete, it’s time to display them! These elegant eggs add a touch of sophistication to any spring or Easter decor. Here are some creative ways to showcase them:
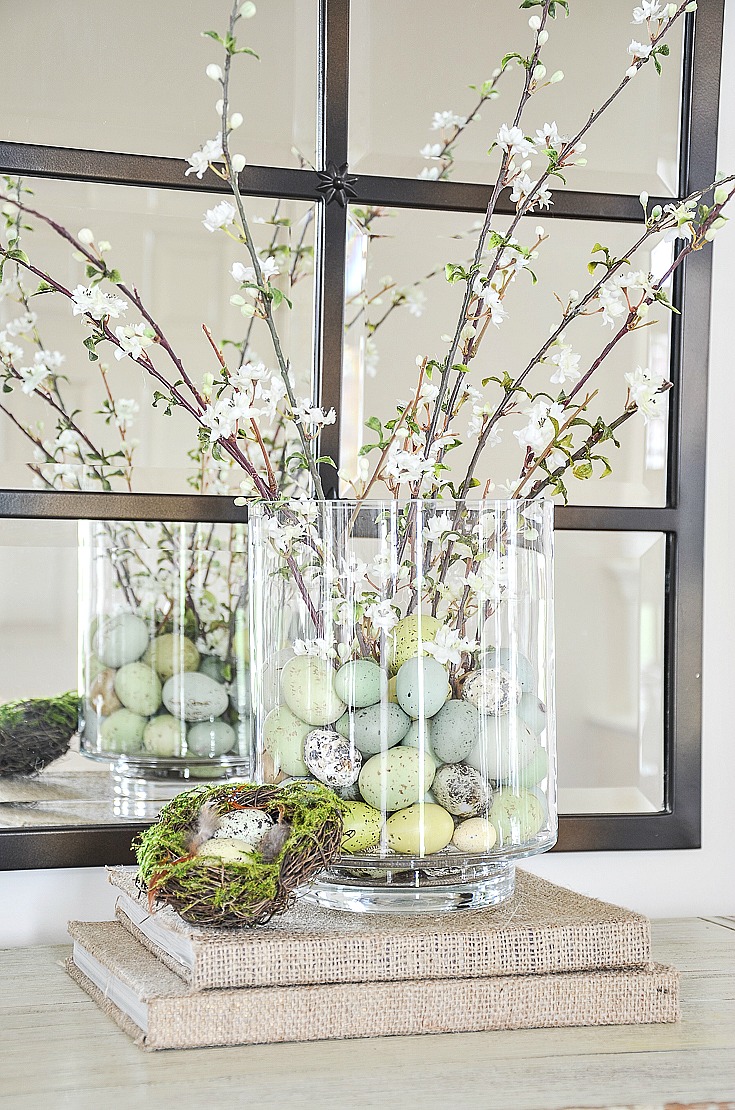
- Layer them in a large glass hurricane for a chic and collected look. Stack them with natural elements like moss or raffia for added texture.
- Tuck one into a tiny nest and display it on a shelf, coffee table, or sideboard.
- Place an egg at each place setting on an Easter table for a unique and decorative touch that doubles as a conversation starter.
- Perch an egg on a candlestick to create an elegant, elevated display. Mix and match candlestick heights for visual interest.
- Nestle them in a handful of moss inside a decorative bowl or tray for an organic, nature-inspired look.
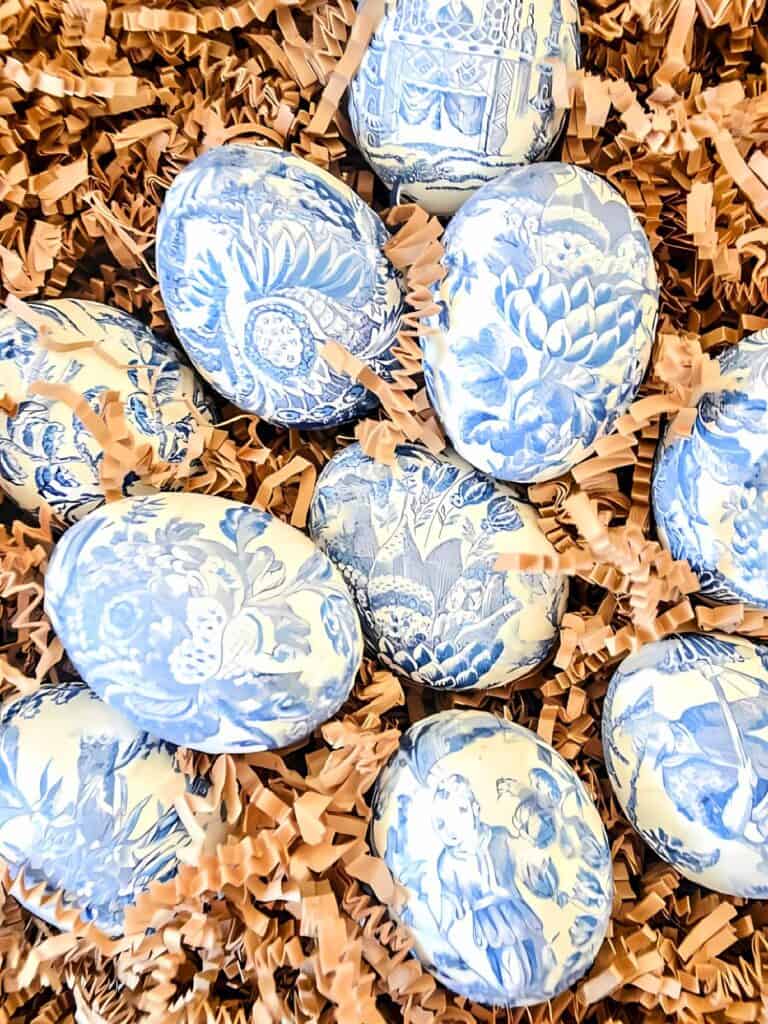
- Arrange them in an Easter basket with white crinkle paper for a soft and sophisticated take on classic holiday decor.
- Style them in a dough bowl with other spring elements like faux greenery, small flowers, or miniature bunnies for a curated seasonal centerpiece.
- Display them in a lidded apothecary jar for a simple yet elegant spring vignette.
Chinoiserie Easter eggs are a beautiful and unique way to elevate your spring decor.
This easy decoupage DIY is perfect for anyone to try, from a seasoned crafter to a beginner. With a little Mod Podge, a few pretty napkins, and some creativity, you can create stunning eggs that look high-end but are completely budget-friendly. Try making a batch this Easter, and enjoy the beauty they bring to your home year after year!

FAQs About Chinoiserie Egg DIY
Other Posts To Enjoy
Beautiful Decoupage Easter Eggs
More Spring DIYs
Beautiful and easy to make, these spring DIYs be fun to make and look so attractive in your home

I hope you will make these beautiful Chinoiserie pumpkins. If blue and white is not your spring thing, you can choose any decorative napkin! Happy Spring DIY-ing!
Happy Spring crafting, friends!


Hi Yvonne! I just love chinoiserie anything. I collect the ginger jars. I love how you’ve transformed these eggs into chinoiserie eggs, just beautiful! I’m going to try this same technique on some pumpkins in the fall as well. I bet they’d look great! Didn’t you have some of those this past fall? Someone did and I just loved them so much! I saw where someone else did these same type eggs but she cut her designs from the napkins out piece by piece. Well who’s got time for that? Not me! I like your way much better! Thanks so much for the link for the napkins and the tutorial. I think I can actually do this, lol! Have a great blessed day! ?
I did make chinoiserie pumpkins. Here’s the link:
https://www.stonegableblog.com/chinoiserie-pumpkin-diy/
Hi Yvonne,
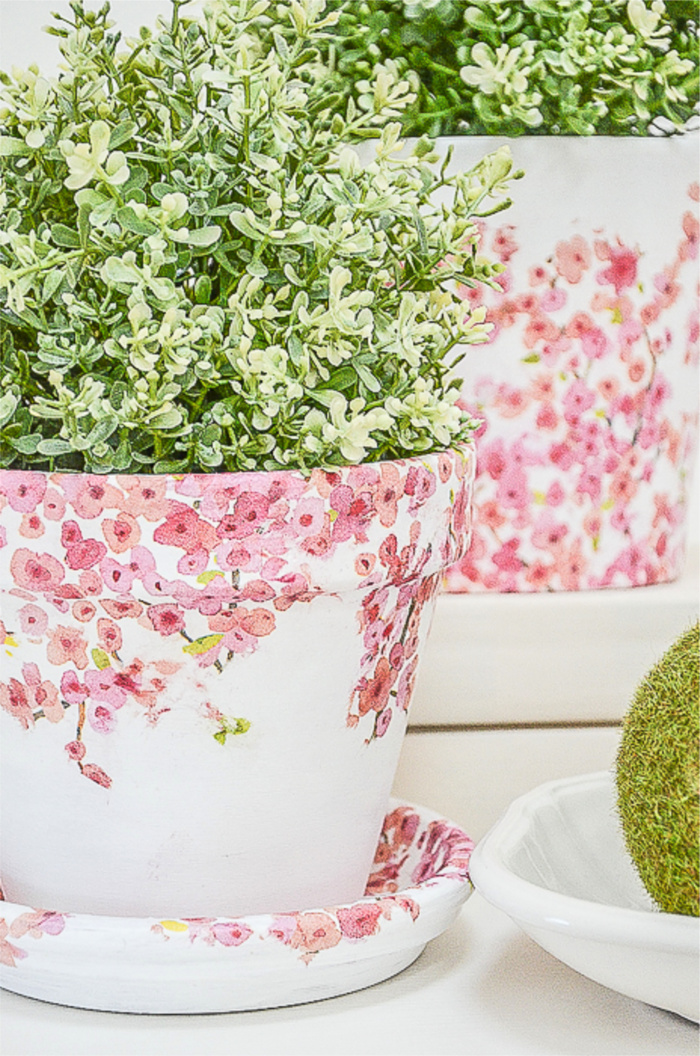
The napkins are ordered! Today I’m trying modpodge for the first time with terra cotta flower pots. Not sure how successful I will be with blowing out eggs, but I might give this a try if I like working with the modpodge.
The eggs look beautiful and would fit right in with the blue and white I have going on right now at home.
This is a fav project of mine..your chinoiserie eggs are beautiful!
Yvonne, These eggs are so beautiful and in my FAVORITE color scheme, blue and white!! I can’t wait to try this DIY. PS LOVE, love , love all of your decorating and your beautiful home !!!
Happy Easter!
Thanks so much Vicki!
Beautiful !
Oh how pretty! I love these. Last fall I made the Chinoiserie pumpkins like yours and love them. I received so many compliments, and added lots of blue in my usual fall colors and was thrilled with the result. Now to try the eggs!
Yvonne, these are so gorgeous and everyone else thinks so, too because the napkins are sold out on Amazon! I guess I’m late to the party. I may look around a bit and see if I can find another design I like and try that until I can get my hands on the beautiful blue and white. You always have the most wonderfully creative DIY’s and I look forward to each new post! Thank you!
Oh no! Try to do search on Amazon of “blue and white paper cocktail napkins” or “paper chinoiserie napkins” and see what happens.
Thank you! I found some that I think will work – they’ve got a lot of pink, though, but I’ll practice and continue to look for the gorgeous blue and white.
Beautiful X10 ❤️❤️❤️❤️❤️
I love the eggs, it looks easy seeing you do them. Maybe I will be successful!!! I love you post!!!
Absolutely gorgeous! And, so easy. I’m going to try this. Thanks for giving us so many helpful hints and ideas. So love reading your blog!
these are gorgeous!! And seem simple!
Love these eggs! Do you think I could use white plastic eggs for this process? Yours are beautiful.
Just gorgeous, Yvonne! So glad you shared on Homestyle Gathering! 😉 Hehe!
Another option is to glue some plastic eggs together, insert a toothpick in the hole they all have. Place egg on foam and spray paint a matt white, allow to dry, and then embellish.
These are so gorgeous that I would not limit their use to Easter; I am a blue and white china fan–can you tell??? Next time, I will get white eggs at the grocery store and we’ll be eating omelets and scrambled eggs forever!!!
I know! But I am also so partial to blue and white
My Dear Yvonne
It has been several years ( 4 spinal surgeries) since I have visited your beautiful home, your lovely personality, AND Wonderful Ideas. Your words and mine “Perfectly Sublime”, Gorgeous are the words I would use to describe these Beautiful Blue and White Eggs! Blue and White is also my favorite too!
Hi Elizabeth, welcome back! I pray your back is better! I’m so glad you are here!
I’m making them right now! beautiful
YAY!
These eggs are gorgeous! I’m going to have to try them.
They are also so easy to make!
I did the pumpkin in the fall and will be making these as well!❤️. Thanks!
Yay! I know they will look so pretty as part of your spring decor.
Hi Yvonne…I’m a long time follower . I made these covered eggs with blue toil napkins …they are gorgeous! They are goose eggs that I was planning to paint. This was much easier and of course the blue goes great with my collection of blue and white China and cobalt blue depression ware. Thanks for the inspiration. Sandi
Sandi, I bet the goose eggs done in blue and white are fabulous!